Main Menu
- Home
- Product Finder
- Calibration Systems
- Calibration Services
- Digital Sensing
- Industrial Vibration Calibration
- Modal and Vibration Testing
- Non-Destructive Testing
- Sound & Vibration Rental Program
- Learn
- About Us
- Contact Us
 Accelerometer calibration is one discipline that relies on “the basics” as fundamental to accurate operation and reporting. Small mistakes in these three critical areas can lead to significant errors in the outcomes of the calibration
process…
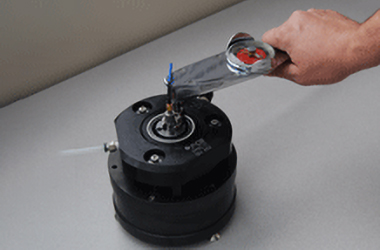
A major consideration in an accurate accelerometer calibration procedure is proper mounting of the sensor. First and foremost, ensure that the mounting surfaces meet the flatness and surface finish specification recommended by your sensor manufacturer. Additionally, clean both surfaces thoroughly, free of any grit, hair or mechanical particles that would compromise the integrity of the mount. A thin layer of silicone grease should be applied at all interfaces to provide enhanced coupling which reduces relative motion at high frequencies and provides the flattest response. If the sensor has a threaded mount, use a stud of proper thread gauge and length to ensure that neither end is bottomed out and that the mounting holes have a sufficient counter bore to accept the shoulder (designed to keep stud centered). Without a counter bore, the sensor mount may seem flush, but actually rides with a slight gap above the mounting surface. The mounted frequency response will show a tremendous rise from the relative motion of resonance of the sensor on the stud rather than intimate contact with the mounting surface. A final consideration is to apply and measure the proper mounting torque as recommended by the manufacturer (typically 10-20 in-lbs for a 10-32 threaded PCB Piezotronics BeCu mounting stud).
A second major consideration, and consistently one of the most troubling, relates to proper handling of cabling and connectors. It is always a good practice to twist the ground shell of a microdot connector onto the sensor rather than twisting the sensor onto the connector prior to mounting. The latter, although easier due to the relative size of the sensor body to the connector shell, rotates the sensor about the pin rather than sliding the pin in the mating socket. This has the potential to torque the signal pin of the cable connector, eventually causing it to fail. Keep connectors on both the sensor and cabling clean of skin oils, dust, and contaminants, which is particularly important if operating in high impedance charge mode so as to not form a reduced resistance path to ground for signal degradation. Pay extra attention in charge mode operation for cable strain relief and routing to avoid noise contributed from triboelectric effects. Minimize the overall length of cabling to a charge amplifier to minimize any additional interference/noise. It is a well known practice to use low impedance ICP® operation to simplify and improve these measurement challenges. Regardless, choose a flexible cable and strain relief support at low frequencies to reduce/eliminate cable reaction forces.
A third, and final, tip in the back to basics list is to ensure your organization has the operating procedures and discipline to run a daily verification transducer. This simple, fast and inexpensive habit has a multitude of benefits. In addition to the fundamental system level verification of equipment operation (by duplicating the known calibration curve of the verification sensor) this exercise in daily proficiency monitors operator skill as well as good cabling and mounting habits. Systemically, by storing away this daily data, simple trending can provide a window to measurement anomalies like drift, operator issues like mount variance of torque and surface cleanliness. Plotting the trends with basis statistics like upper and lower control limits allows for intelligent differentiation between common variance in data and when to investigate equipment or practices due to special-cause variance.
Every accelerometer calibration laboratory has the challenge of mastering and institutionalizing these basics. When you couple these skills with an annual Inter-Laboratory Comparison (ILC)/proficiency, it ensures both a check and balance, as well as an opportunity for exchange of best practices and additional learning. Ask us about either, we’d be glad to tell you more.